
Steps to Production Series -Markers
Making a Marker is like playing Tetris, but it is vital to be able to produce and scale your line at the most cost effective price. In this blog, I will go over the key points to keep in mind while creating a Marker.

MARKERS?!?!? I have to be honest, I have been dreading this blog post. Markers are one of the hardest things to explain when it comes to development. My blog was going to read “hire a trusted professional, trust them, move to production, the end,” but I thought I would first take a stab at explaining what a marker actually is. My initial sentiment still stands: this step is for the pros, do not attempt this at home. Why? Firstly, in order to be efficient in grading and marker making you will need a digital patterning system (CAD such as Opitex or Gerber) and these systems, when including a plotter and printer, can cost up to 25K. In order to have this equipment effectively pay for itself, you would have to create thousands of markers. Fortunately, they are not too expensive to outsource and hire a team to make. Secondly, you still need to be a trained, experienced pattern maker in order to know what to do within these systems. So, hire us, hire anyone, to do this for you, I promise you won’t regret it.
Ok, so what actually is a marker? Simply put, it is a layout of all your patterns of all your sizes put digitally on paper that is the width of your fabric. Think tetris. You want to arrange the pattern pieces as closely together as possible while keeping them on grain. Then a piece of paper is printed that contains all the pattern pieces needed per fabric. Each fabric will have it’s own marker. This paper marker will get laid on top of the pile of fabric and cut all at the same time. This is also why you will need to reprint your marker after each production run because the factory will cut up the paper.
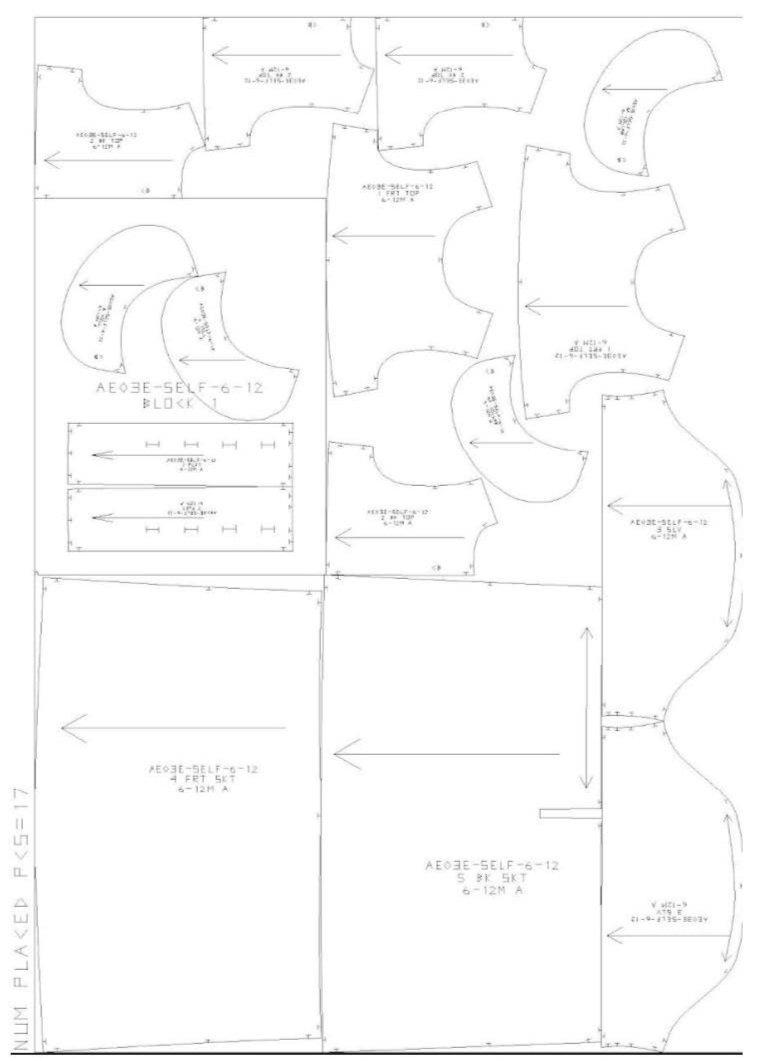
In order to create the marker you will need a cutters must. A cutters must list all the pattern pieces, what fabric that pattern piece is cut out of, and how many to cut. If you sew at home you may be used to “cut on fold” but with production patterns, cutting on the fold is not doable and all the fabric will need to be flat in order to pile multiple layers. So this means a sleeve, cut 2, must be on the marker twice in order for two to be cut.
You will also need to know your cuttable width of your fabric when ordering your marker. The cuttable width is different than the actual width of the fabric. If your fabric is 60” wide, the cuttable width is 58”. This leaves one inch on either side for the selvage not to be used in the garment.
You will also need to inform your marker maker of any weft on the fabric, like fake fur, velvet, or a wool that has texture. If you want the garment to have all the fibers facing down then it will need to be noted so all your pattern pieces go the same direction. This also goes the same for a printed fabric. If you have smiley faces on your garment that all need to be right side up, the marker maker will need to know. And don’t forget about matching stripes or plaids, if you want those to line up at the seams, it has to be built into the marker!
One final note about markers, after your patterns are graded and markers are created, the digitizer will give you your exact yields. Yields are the exact amount of fabric needed to create one garment and each size has its own yield. Size smalls take less fabric than the size larges. When calculating your yields to order fabric for production, use the median yield number. Yes, this means all the size smalls in the world are paying for the extra fabric used in the size large, but the alternative is costing your small size at less than your large, which probably wouldn’t go over well. This is also why it’s hard to produce plus size at the same price as an off the rack size small, but we won’t get into that now.
In summary, you do not need to know how to create a marker but you do need to know what information a digitizer will need in order to create the deliverables.
1. Size Chart
This we covered in the post about grading. It provides the grade rules between sizes.
2. All Pattern Pieces
Double check all pattern pieces are included. Sometimes a binding or a collar piece goes missing while it’s in the shuffle of development. You can do this on your own by matching the pattern pieces to those listed out on the cutters must provided by the pattern maker
3. Perfect Sample
This is a good idea to have around to double check the pattern pieces and cutters must. It helps give a visual to the items that have been laid out on paper.
4. Cutters Must
Your pattern maker will provide this for you after the pattern has been perfected and confirmed. It is a list of all the pattern pieces, the number that need to be cut, and out of what fabric.
5. Cuttable Fabric Width
This is on the order form from the fabric vendor and can be easily found. Please note the number that the fabric vendor provides is not the cuttable width, subtract 2” from that to get cuttable (unless for some reason the selvage is larger and you will need to assume more)
6. Production Order Numbers
This is for the production marker. For example, if you are creating 25 smalls, 50 mediums, and 25 larges the marker will need to have 2 size mediums on it in order to double the number cut.
7. Weft, Matching Seams, Fabric Direction
This gives the needed information so that everything matches at the seams if needed and goes the proper way if specific weft on the fabric.
Hope this helps! And remember, we can do this step for you so there are no mistakes. If a marker is created incorrectly and all of your production is cut wrong, it can be detrimental to your pocket book! Make sure you get your production right with V.Mora. We can help consult with your line or manage your production. See the services below that we can help out with.
Steps for the Product Development
Sourcing
Technical sketches
Pattern Making
Prototype making
Sample Making
Fittings
Digitizing and Grading
Marker Making
Manufacturing
For product development services, please email vmorainquiry@vmora.com
